Step 1. Create a new website and Add DataSet to the Website
Right Click on the project, Add new item Dataset, and name it as Employees.xsd.
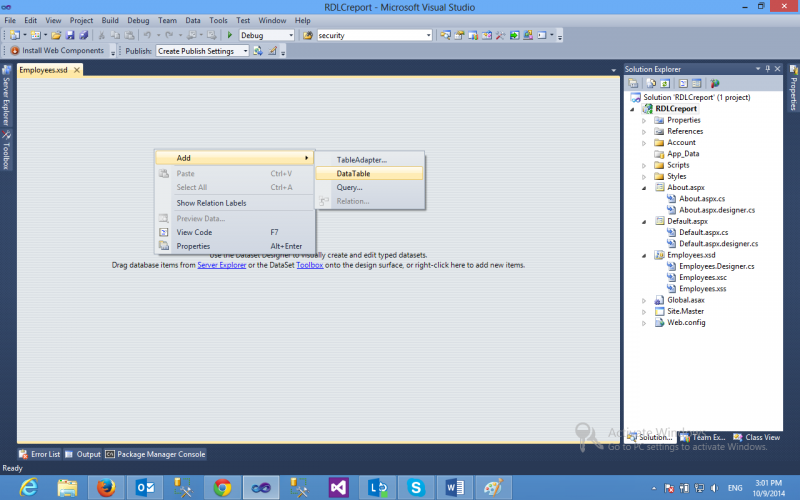
Step 2. Adding DataTable to the DataSet
Our next step would be to add a DataTable to the Type DataSet.
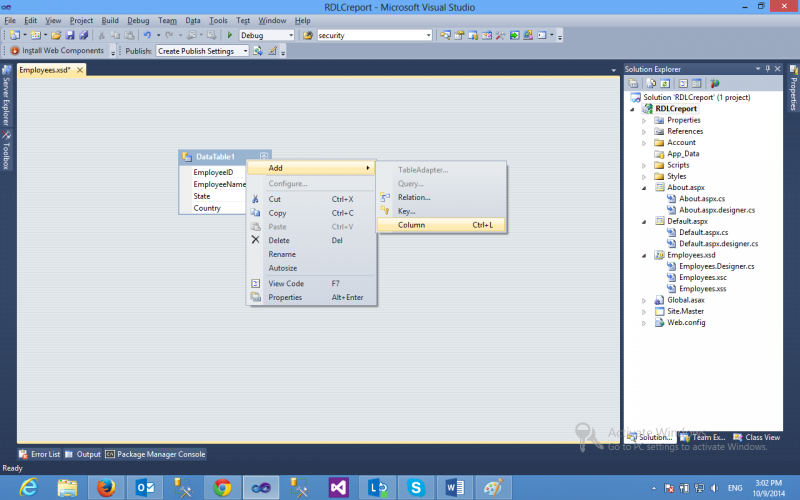
Step 3. Adding Columns or fields to DataTable
In the DataTable we need to specify the column names that we want to display in the Report.
Step 4. Adding the RDLC Report
Right click on the project and Add New Item, Report Wizard where we configure our report.

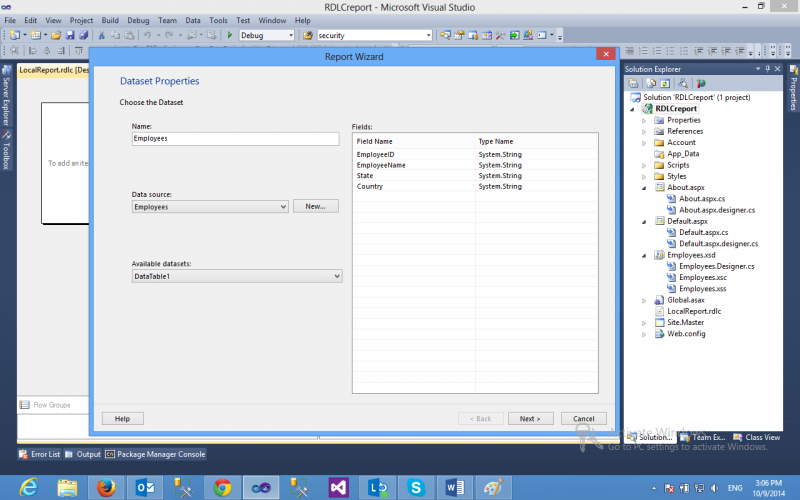
Step 5. Choose the DataSet
Now we need to choose the DataSet that will act as the DataSource for the RDLC Report. Thus we need to select the Customers DataSet that we have created earlier.
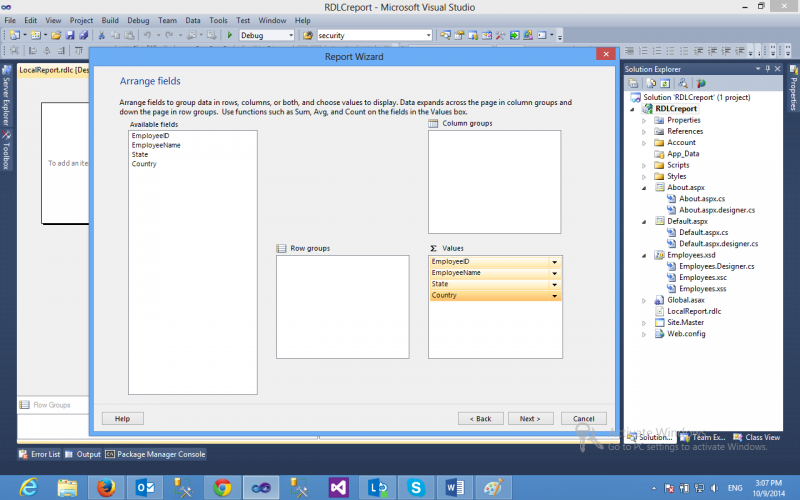
Step 6. Choose the Fields to be displayed in the RDLC Report
Next we need to choose the fields we need to display, we need to simply drag and drop each fields into the Values Box as shown in the screenshot below
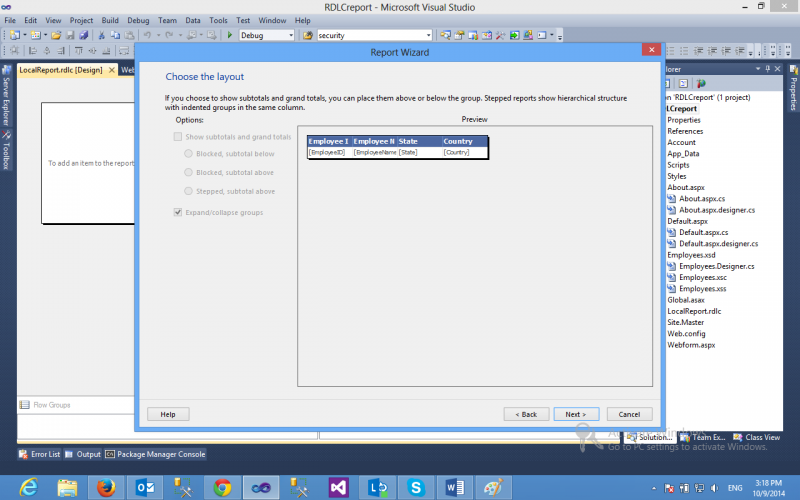
Step 7. Choose the Layout
The next dialog will ask us to choose the layout, we can simply skip it as of now as this is a simple Report with no calculations involved.
Step 8. Choose the Style
Finally we need to choose the style, i.e. color and theme of the Report.

Once you press Finish button on the above step, the Report is ready and is displayed in the Visual Studio as shown below

Step 9. Adding Report Viewer to the page
Add new webform into the project and add ReportViewer and ScriptManager control to the page from the Toolbox. The ReportViewer controls requires ScriptManager on the page.
Once you add the ReportViewer control to the page, your page must look as below
%@ Page Language=”C#” AutoEventWireup=”true” CodeBehind=”Webform.aspx.cs” Inherits=”RDLCreport.Webform” %>
<%@ Register Assembly=”Microsoft.ReportViewer.WebForms, Version=10.0.0.0, Culture=neutral, PublicKeyToken=b03f5f7f11d50a3a”
Namespace=”Microsoft.Reporting.WebForms” TagPrefix=”rsweb” %>
Step 10. Getting data from database to RDLC report.
Below is the code to data from database to RDLC report. The first statement notifies the ReportViewer control that the Report is of type Local Report.
Then the path of the Report is supplied to the ReportViewer, after that the Employees DataSet is populated with records from the Employees Table is set as ReportSource to the Report.
C#
Namespaces
using System.Data;
using System.Configuration;
using System.Data.SqlClient;
using Microsoft.Reporting.WebForms;
protected void Page_Load(object sender, EventArgs e)
{
if (!IsPostBack)
{
ReportViewer1.ProcessingMode = ProcessingMode.Local;
ReportViewer1.LocalReport.ReportPath = Server.MapPath(“~/LocalReport.rdlc”);
Employees dsEmployees = GetEmployees(“select top 10 * from employees”);
ReportDataSource datasource = new ReportDataSource(“Employees”, dsEmployees.Tables[0]);
ReportViewer1.LocalReport.DataSources.Clear();
ReportViewer1.LocalReport.DataSources.Add(datasource);
}
}
private Employees GetEmployees(string query)
{
string conString = ConfigurationManager.ConnectionStrings[“constr”].ConnectionString;
SqlCommand cmd = new SqlCommand(query);
using (SqlConnection con = new SqlConnection(conString))
{
using (SqlDataAdapter sda = new SqlDataAdapter())
{
cmd.Connection = con;
sda.SelectCommand = cmd;
using (Employees dsEmployees = new Employees())
{
sda.Fill(dsEmployees, “DataTable1”);
return dsEmployees;
}
}
}
}
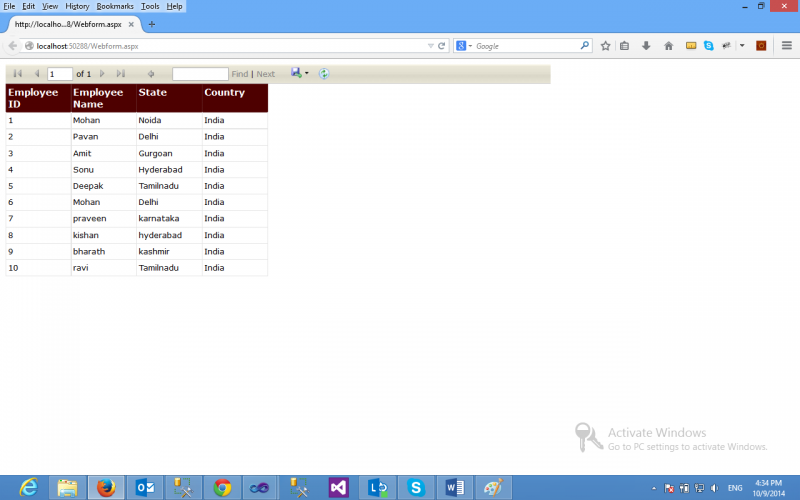
Your RDLC report has been displayed below in the browser
Thank You