VB script Error Handling
Durning run time, if QTP encounters any erorr then it will display the error message which haults the script execution. Inorder to overcome this we should suppress the error message and then we should take appropriate action to handle the error. This can be done using “On error Resume Next” and err.number
Example:
Dim a,b,c
A = 10
B = 0
C = a+b
Print “Sum =” &c
C = a/b
If err.number = 11 then
Print err.Description
Else
Print “Div=” C
End if
C = a*B
Print “Mul= “& c
Note: This concept has following disadvantages
- On error resume next Statement should be specified at the beginning of every QTP action
- We should know the exact line number where the error occurs.
- We should also remember the error number.
In order to overcome above mentioned limitations we can use Recovery Scenario Manager (RSM)
Recovery Scenarios in QTP
During a test execution sometimes, unexpected or unpredictable events may occur which may cause failure of test execution. To recover the tests and continue running the scripts at runtime, we need the recovery scenarios. These recovery scenarios will handle all these problems automatically by QTP during runtime
Recovery Scenario Manager
You can create recovery scenarios using the QTP tool feature called Recovery Scenario Manager. It is a wizard based solution to identify and manage recovery scenarios. Using this we create a recovery file. In this recovery file, you define and manage a set of recovery scenarios each to handle a specific error. These recovery scenarios we associate to QTP test, so that during a test execution if any unpredictable error occurs, QTP will take care of handling it with the help of associated scenarios and then it continues further execution smoothly.
Defining Recovery Scenarios
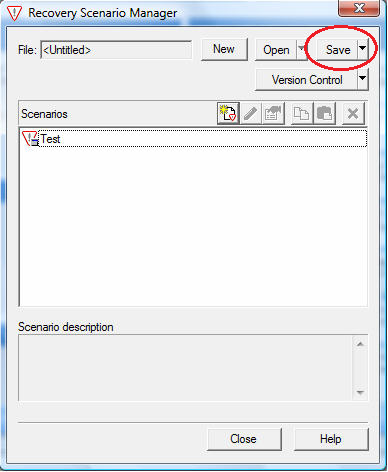
Step 1: Go to ‘Resources’ -> select ‘Recovery Scenario Manager’. And click on New Scenario icon as shown in below picture:

Step 2: New Scenario icon will launch ‘Recovery Scenario Wizard’. Using this wizard, we will define the recovery scenarios. Click on ‘Next’ button.

Step 3: Trigger-> here we need to define an event that interrupts our test execution like runtime error, etc. Trigger events are one of the event mentioned in below picture
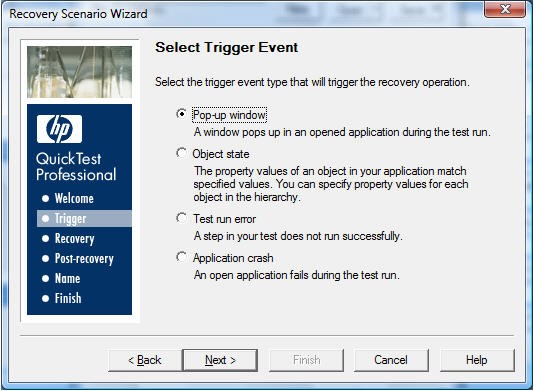
Step 4: Choose the right event as per your scenario. And click ‘Next’ button.
Step 5: Choose ‘point hand’ icon button to add the window which you would like to add as shown below and click ‘Next’ button

Step 6: Recovery-> here we will attach an operation which enables the QTP to continue from test execution. The recovery operations includes Close popup dialog, etc. Recovery operation can be one of the below operation. Click on ‘Next’ button

Step 7: Choose your operation here which to be performed and click on ‘Next’ button

Step 8: It opens a summary of Recovery Operations. If you want to add more recovery operations, you can keep the check box ‘Add another recovery operation’ and click on ‘Next’ button, it will directs you to Step 6. Else, if you are done click on ‘Next’ button

Step 9: Now wizard will open a ‘Post-recovery’ window. Here we need to define what the post recovery operation is. The list of post recovery operations are listed in below screen. All these operations are as their name indicates. Finally click on ‘Next’ button.

Step 10: Now provide your recovery scenario name and description as shown below:

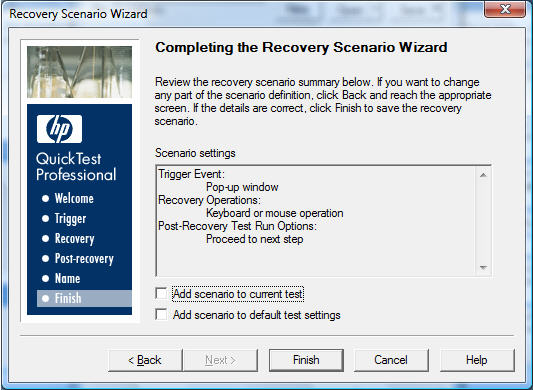
Step 11: Finish -> this is the last step on creating recovery scenario. And will show the summary of scenario which we created. As you can see in the below screen, there are two checkboxes at bottom. ‘Add scenario to current test’ will associate the recovery scenario to current test. And ‘Add scenario to default test settings’ will associate the current recovery scenario to all other tests. Once you choose what you need on this dialog, click on ‘Finish’ button.
Step 12: Once you finish creating recovery scenario, wizard directs you to ‘Recovery scenario Manager’ where it shows you list of all recovery scenarios we created. At last you can save all your scenarios to a file system with the extension .qrs by clicking ‘Save’ button.