Selenium WebDriver Test Automation framework allows us to write the automation scripts for web applications and execute them in various browsers.
In some test scenarios, you might need to verify the functionality of uploading the files. The file web element launches the windows file upload dialog to browse and select the files. With the help of selenium WebDriver we can only launch the upload dialog by clicking the file element button, but it can’t interact with upload dialog.
In order to interact with windows dialog we need to use the AutoIt tool. AutoIt is scripting language which is used to automate windows dialogs.
Here are the steps about writing the scripts using AutoIt.
1. The very first step is download and install the AutoIt tool. To download the AutoIt use the following URL https://www.autoitscript.com/site/autoit/downloads/
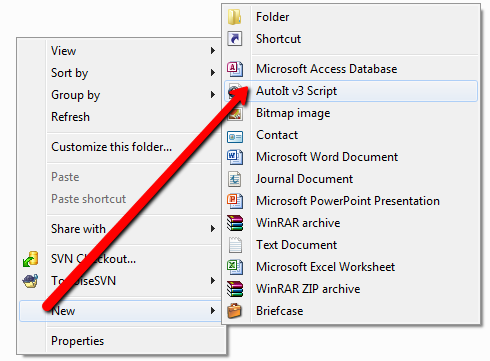
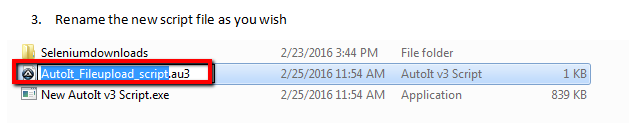
2. After successful installation of AutoIt tool, we need to write the AutoIt script for uploading the file. For this, go to directory -> right click -> New -> AutoIt V3 Script
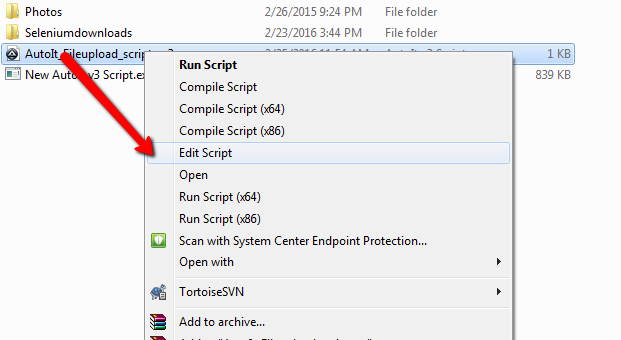
3. Right click on the new script file and choose Edit Script.
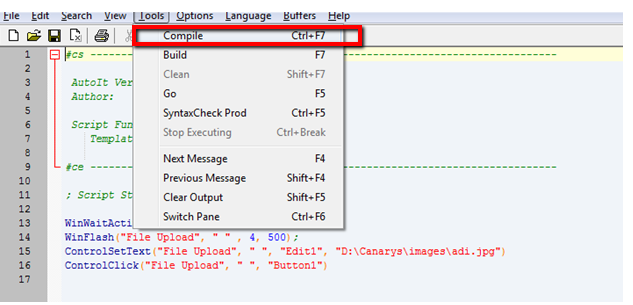
4. Now the script file will be opened in AutoIt Script editor. Add the file upload script to the editor as shown below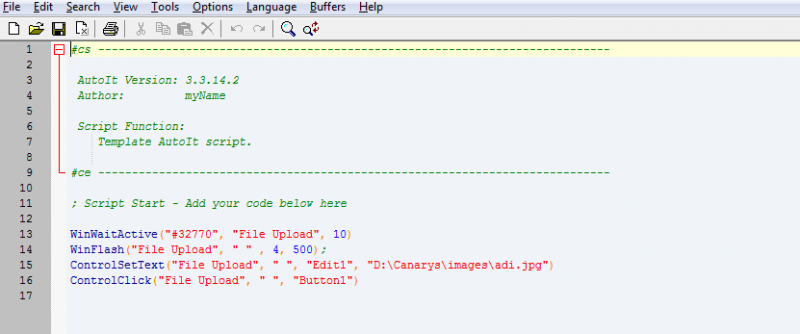
· WinWaitActive(“#32770”, “File Upload”, 10)
o This statement will pause the script not to execute the further until 10 seconds to appear the upload dialog
· Win Flash(“File Upload”, ” ” , 4, 500)
o WinFlash statement is used to flash the window in taskbar about 500 milliseconds
· ControlSetText(“File Upload”, ” “, “Edit1”, “D:Canarysimagesadi.jpg”)
o ControlSetText command will add the given text into the given control like adding the image path to control Edit1 in this statement
· ControlClick(“File Upload”, ” “, “Button1”)
o ControlClick command will do the mouse click on Button1
You can notice that in the above statements with first parameter as #32770 and File Upload, these are the titles or window class names. We can get them by using AutoIt Window Info feature which comes with AutoIt installation as described below:

Drag the finder tool icon on any control you need from upload dialog, AutoIt Window Info tool will give the detailed properties about the control.
5. Now you need to compile the script. Goto Tools -> Compile as shown below
6. The script will be compiled and AutoIt will create an executable file which should be used with Selenium WebDriver
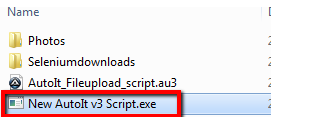
7. Now AutoIt file upload script is ready to use with Selenium WebDriver framework.
Here are the few Selenium WebDriver scripts before you use the AutoIt upload dialog executable.
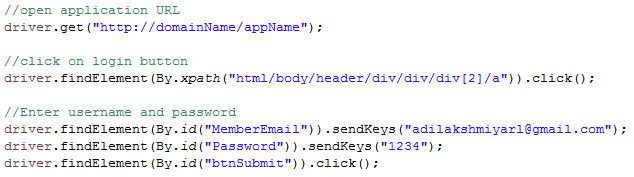
1. Launch the browser using WebDriver framework

2. Access the application, click on login button, fill username and password and click on submit button
3. Navigate to the menu item or page where file upload control is available on the web page and fill the details. The two important things need to remember here are click on the file upload control and executing the AutoIt file upload script which will interact with the window’s upload dialog.

Hope you learn the usage of AutoIt in Selenium to upload the files. Thank you.