Sonatype Nexus supports the Repository Manager integration with various active directory systems for authentication, such as Microsoft Exchange / Active Directory, OpenLDAP, ApacheDS, and others. In order to use LDAP authentication in the nexus repository manager, we will need to add the LDAP Authentication Realm by navigating to the realms option which is available in administration settings under security section.
But the Best practice is to leave the Local Authenticating Realm and the Local Authorizing Realm activated so that the repository manager can be used by anonymous, admin and other users configured in this realm even with LDAP authentication offline or unavailable. Any user account not found in the Local Authenticating Realm will be passed through to LDAP authentication. Now let’s see how LDAP server connection with Sonatype Nexus are created as follows.
LDAP Server Configurations: –
LDAP server configuration can be achieved in just a few simple steps.
- Creation of an LDAP server connection by providing appropriate information.
- Then provide necessary details for mapping to users and groups, too.
The following parameters listed in the image below are to be filled in.
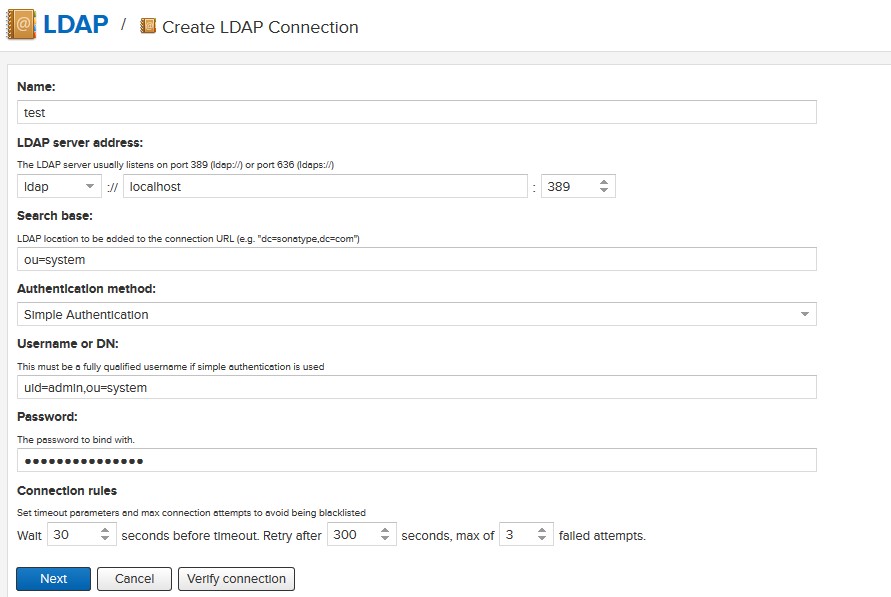
In the above figure, Create LDAP Connection page shows a LDAP connection configuration for the repository manager configured to connect to an LDAP server running on localhost port 389 using the search base of ou=system. We saw a sample parameter values in the picture above, but when entering the details make sure that you fill in the correct information like LDAP server address, username and password etc.
After all the necessary details have been given, we need to verify the connection by clicking the ‘Verify connection’ button. After we receive the successful connection message, the user and group mapping for the LDAP configuration will be further configured by clicking the ‘Next’ button.
The repository manager can cache authentication information and supports multiple LDAP servers and user/group mappings. Connection details to the LDAP server and the user or group mappings as well as specific account logins can be tested directly from the user interface.
User and Group Mappings
The following parameters need to be filled in for configuring user and group elements in with the repository manager.
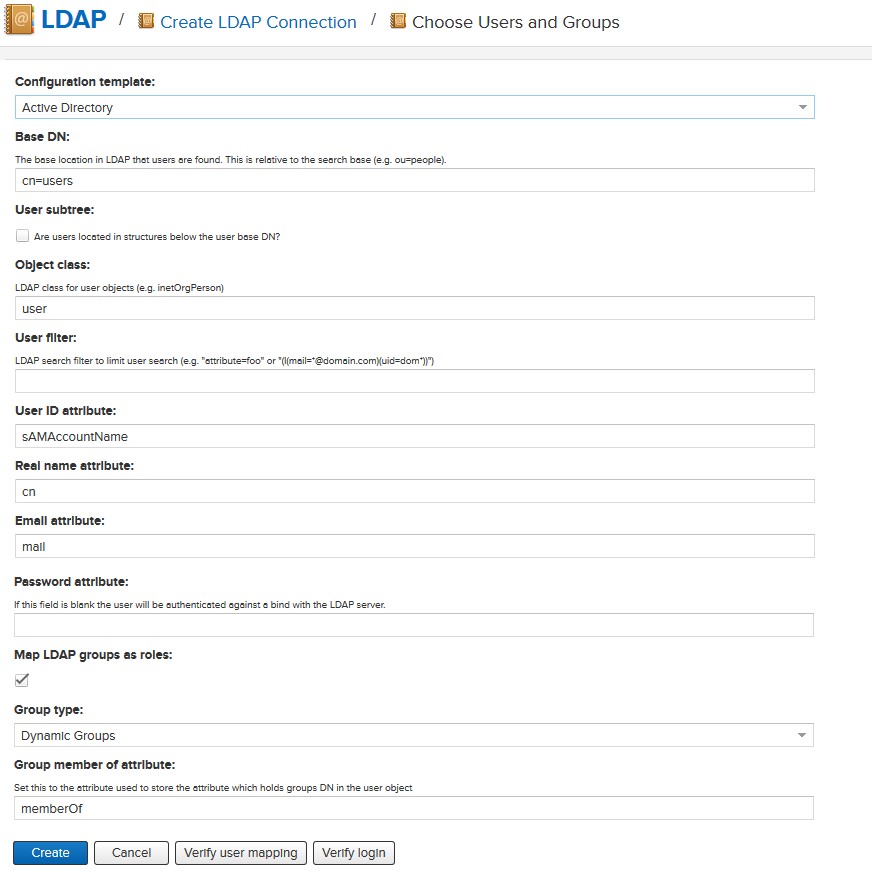
The above LDAP connection page contains a section to manage user and group mappings. This configuration is the next step after you configure and verify the LDAP Connection. It is separate page called Choose Users and Groups. We need to configure the necessary settings here in this tab, such as selecting the configuration template, Base DN, group type etc.
Once you have configured the user and group settings on the Choose Users and Groups page, you can check the correctness of your user mapping by pressing the ‘Verify user mapping’ button. A successful mapping will result in the retrieval of a list of user records, which will be shown in the User Mapping Test Result dialog.
We can even login directly to verify the user login once successful user mapping is done. To do this, we will need to click the ‘Verify login’ button at the bottom of the Users and Groups page which is already available there. The Verify login button can be used to check if authentication and user/group mappings work as expected for a specific user account besides the global account used for the LDAP configuration.
After the successful configuration of LDAP connection and user and group mappings, now we can proceed to configure external role mappings and assign them to users. This allows us to define the repository manager specific security for a LDAP group.