Windows Service in C#:
This article is about how to create a Windows Service in C# .net using Visual Studio.
Windows Services:
Windows services are the executable applications which run in the background and doesn’t contain any user interface. Windows services can be scheduled to run automatically whenever operating system boots or can be started/stopped/paused manually from the services window.

Above Services window can be opened in following ways:
- Open Run window (Window + R) and type services.msc and press Enter.
- Control Panel > Administrative Tools > Services
- Type services in search option (Win 10 OS).
Scenarios where Windows Services are used:
If there is a requirement where certain task to be done on certain time intervals without user intervention. Consider sending email to the customers, processing some files whenever files are copied to the folder etc.
Step by step process of creating Windows Service:
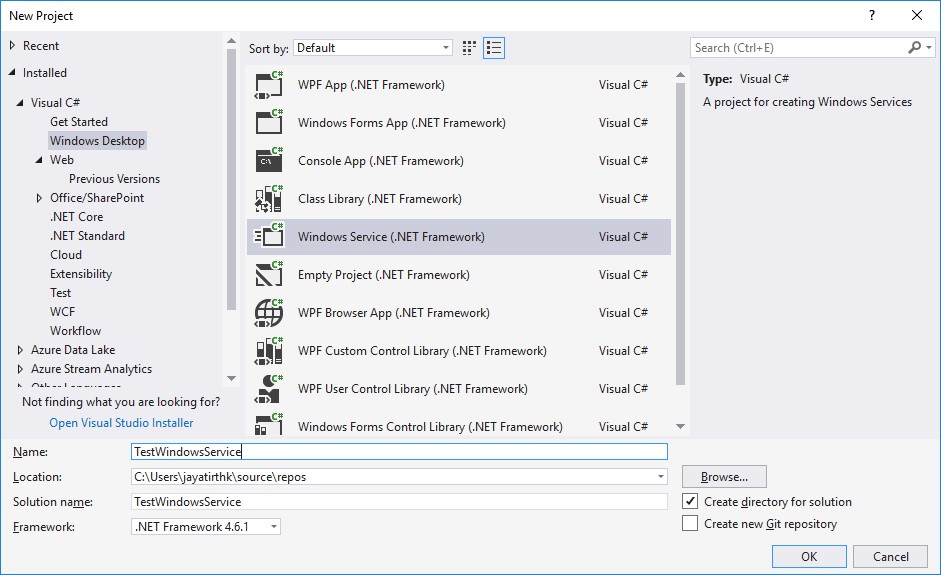
- Open Visual Studio, File > New > Project

2. Under Visual C# Select, Windows Desktop > Windows Service and give an appropriate name, file location to store project and then click OK
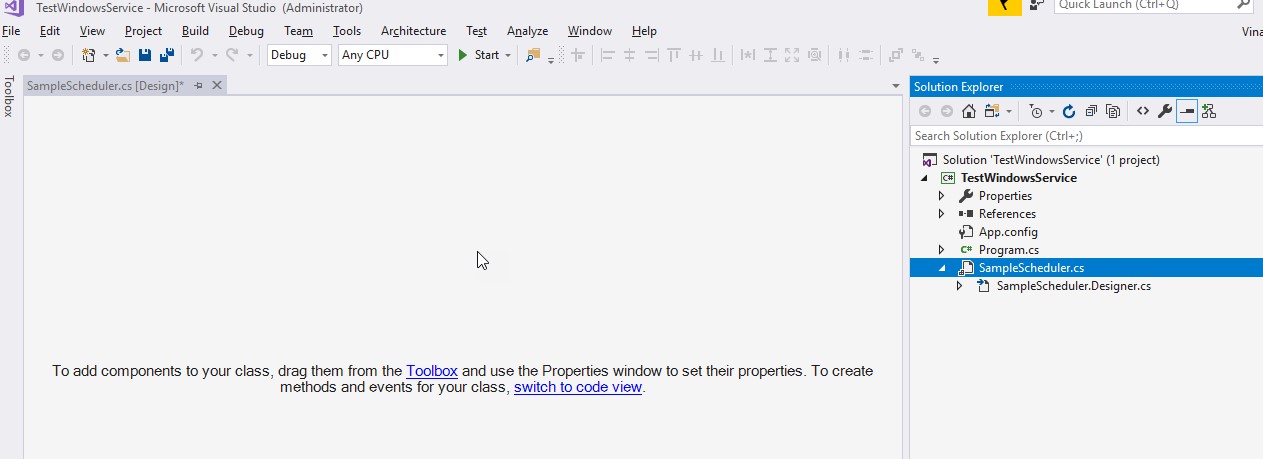
Click on OK button, the below design screen will appear, which is the service. If you want to rename the Service1.cs with any other name, then right click on the file in the solution explorer > Rename. In the following screen changed name to SampleScheduler.cs
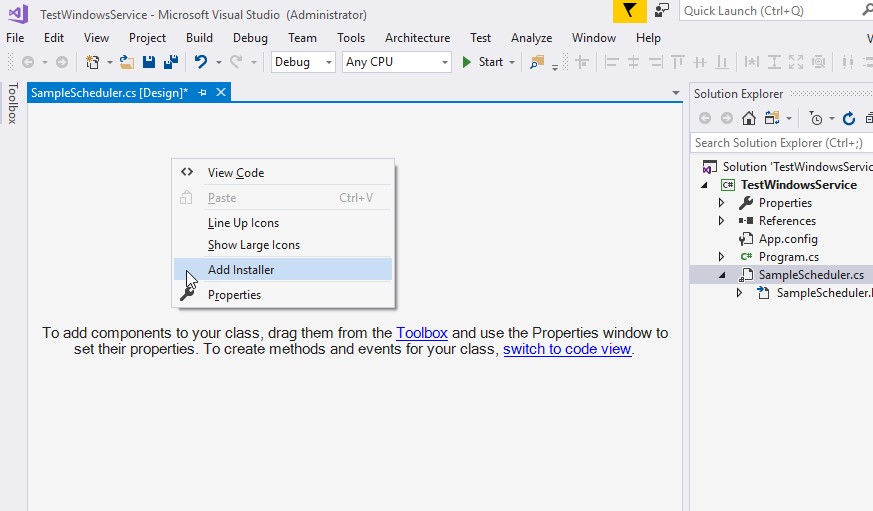
3. Adding Installer to Windows Service:
To run the Windows Service, you need to install the Windows Service application, which registers it with the Services in Control Manager.
Right Click> Add Installer
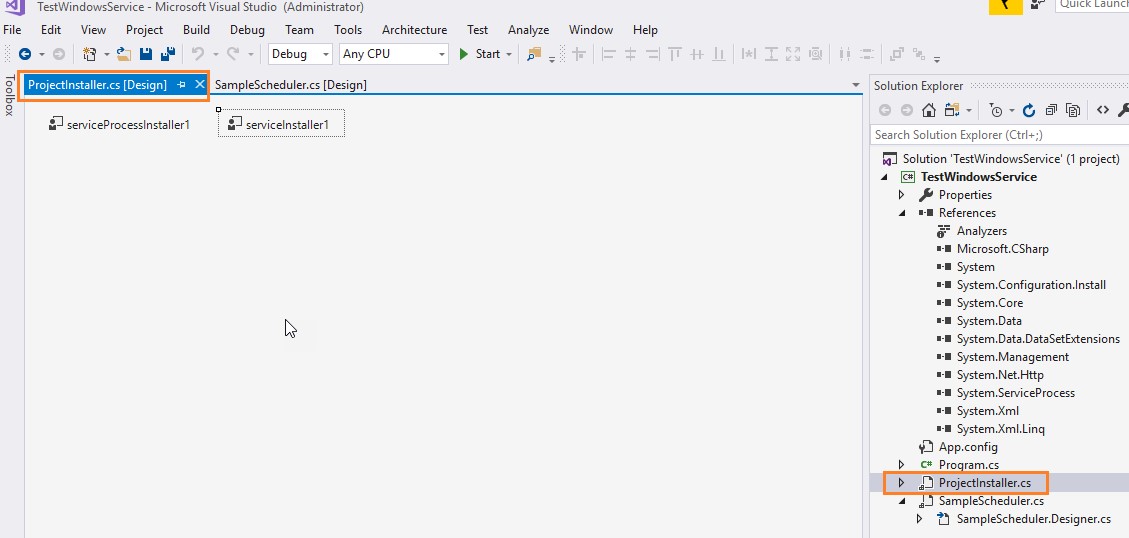
After Adding Installer, ProjectInstaller will be added in your project and ProjectInstaller.cs file will be opened by default. Then save all the files.
4. Right-click on the blank area under ProjectInstaller.cs and select View Code:

It Contains Constructor which has InitializeComponent method. This method contains the logic which creates and initializes the user interface objects dragged on the design surface and properties window will be provided for form window.

It’s important you should not call any method before the call of InitializeComponent method.
5. Go to the definition by pressing F12 Key on InitializeComponent method.
Add the below line:
this.serviceProcessInstaller1.Account = System.ServiceProcess.ServiceAccount.LocalSystem;
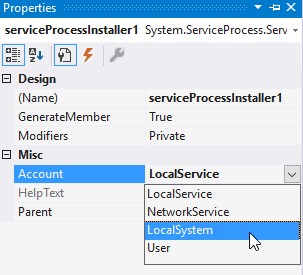
Or the setting can also be changed in design as:
Right click on serviceProcessInstaller1 > Properties

Account > Select LocalSystem
You can also provide optional description and display service name by adding following lines of code:
this.serviceInstaller1.Description = “Test Windows Service”;
this.serviceInstaller1.DisplayName = “WindowsService.Test”;
this.serviceInstaller1.DisplayName will displays the name under services window.

6. In this step we will write code to create timer and text file and write current time in text file using the service in some time intervals. Code will be written in the created in SampleScheduler.cs.
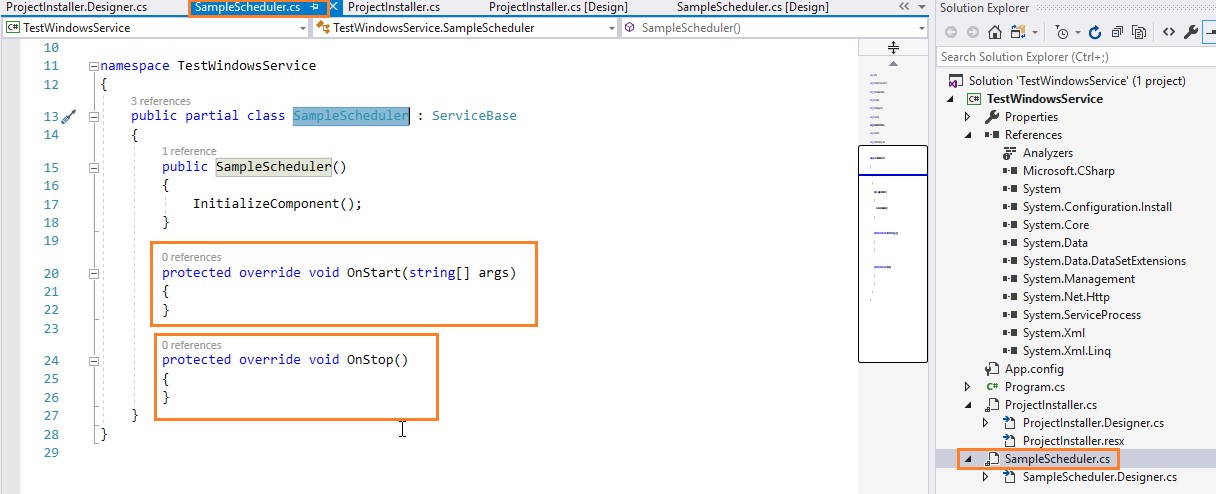
In the above screenshot, you can see two methods called OnStart() and OnStop().
The OnStart() triggers when the Windows Service starts and the OnStop() triggers when the service stops.
The following code must be written in SampleScheduler.cs file.
using System;
using System.Collections.Generic;
using System.ComponentModel;
using System.Data;
usin System.Diagnostics;
using System.ServiceProcess;
using System.Text;
using System.Threading.Tasks;
using System.Timers;
using System.IO;

namespace TestWindowsService
{
    public partial class SampleScheduler : ServiceBase
    {
        Timer timer = new Timer();
        public SampleScheduler()
        {
            InitializeComponent();
        }

        protected override void OnStart(string[] args)
        {
            WriteTextToFile("Service started at " + DateTime.Now);
            timer.Elapsed += new ElapsedEventHandler(OnElapsedTime);
            timer.Interval = 10000; //time interval in milliseconds (10Sec)
            timer.Enabled = true;
        }

        protected override void OnStop()
        {
            WriteTextToFile("Service stopped at " + DateTime.Now);
        }

        private void OnElapsedTime(object source, ElapsedEventArgs e)
        {
            WriteTextToFile("Service recalled at " + DateTime.Now);
        }

        public void WriteTextToFile(string Message)
        {
            string checkPath = AppDomain.CurrentDomain.BaseDirectory + "\LogsFile";
            if (!Directory.Exists(checkPath))
            {
                Directory.CreateDirectory(checkPath);
            }
            string filepath = AppDomain.CurrentDomain.BaseDirectory + "\LogsFile\ServiceLog_" + DateTime.Now.Date.ToShortDateString().Replace('/', '_') + ".txt";
            if (!File.Exists(filepath))
            {
                // Create a file to write to.
                using (StreamWriter sw = File.CreateText(filepath))
                {
                    sw.WriteLine(Message);
                }
            }
            else
            {
                using (StreamWriter sw = File.AppendText(filepath))
                {
                    sw.WriteLine(Message);
                }

            }
        }
    }
}
Above code will create a text file if it doesn’t exists, calls service every 10 seconds and logs into text file.
7. Installing Windows Service:
- Rebuild the project.
- Open command prompt (cmd) in Administrator mode.
- Write the below command in command prompt and press Enter.
cd C:WindowsMicrosoft.NETFrameworkv4.0.30319

d. Copy the full path of your Windows Service exe file: go to the project folder as shown in below screenshot.


As shown in above screen shot, that folder location is where the project file is located go to bin> debug then copy the file with the extension .exe. In this case it is “TestWindowsService.exe”.
Our final path will be C:UsersjayatirthksourcereposTestWindowsServiceTestWindowsServicebinDebug in that path include “TestWindowsService.exe”.
Then add installUtil.exe before the project path while executing in command prompt (same amd which was opened earlier) as shown below.
InstallUtil.exe + your project file path +bindebug+yourservicename.exe
Final path:
C:UsersjayatirthksourcereposTestWindowsServiceTestWindowsServicebindebug TestWindowsService.exe
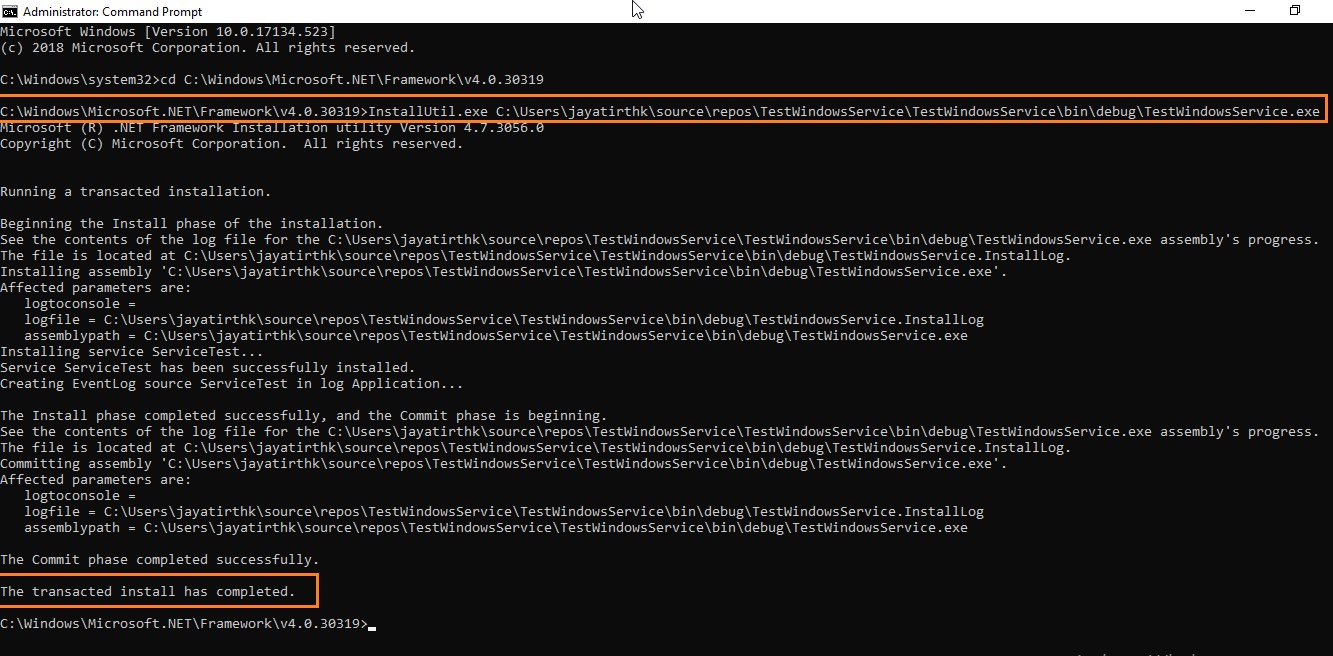
In the above step the installation of the Windows Service has been completed.
To open the installed service, follow the steps below:
As explained earlier, above Services window can be opened in following ways:
- Open Run window (Window + R) and type services.msc and press Enter.
- Control Panel > Administrative Tools > Services
- Type services in search option (Win 10 OS).

Our Service can seen in the above image.
To start the service:
- Click on service as indicated in the above screen shot.
- Right click on the service > Start.
You can schedule the service to start automatically by:
right click on service > properties > new window will pop up > Select start up type as Automatic > Click on start. As shown below screen shot


As seen in the above image service has been started and new text file is created. Time is being logged every 10 seconds.
How to Uninstall the Service:
You need to add -u in front of InstallUtil.exe in command prompt following the path of the project.
InstallUtil.exe -u C:UsersjayatirthksourcereposTestWindowsServiceTestWindowsServicebindebug TestWindowsService.exe
