
Most IT teams spend a large part of their day handling the same kinds of support requests over and over again. This slows down response times and increases workload.
The Virtual Service Agent in Jira Service Management reduces this effort by handling common requests automatically and guiding users to quick solutions.
What is a Virtual Service Agent?
The Virtual Service Agent in Jira Service Management is an AI-powered chatbot designed to resolve common and repetitive requests without human intervention. When a user starts a conversation, the Virtual Service Agent analyzes their request and compares it with a predefined set of intents.
Key Features of the Virtual Service Agent
- ~ Answers common questions instantly without waiting for an agent
- ~ Help users solve simple issues through guided steps
- ~ Reduces ticket volume by handling repetitive requests
- ~ Uses knowledge base articles to provide accurate answers
- ~ Escalates complex issues to human support when needed
- ~ Understands user requests (intents) to give relevant responses
How to Set Up a Virtual Service Agent in Jira Service Management
Step 1: Open Your Service Project
Go to the Jira Service Management project where you want to enable the Virtual Service Agent.
Step 2: Open Project Settings
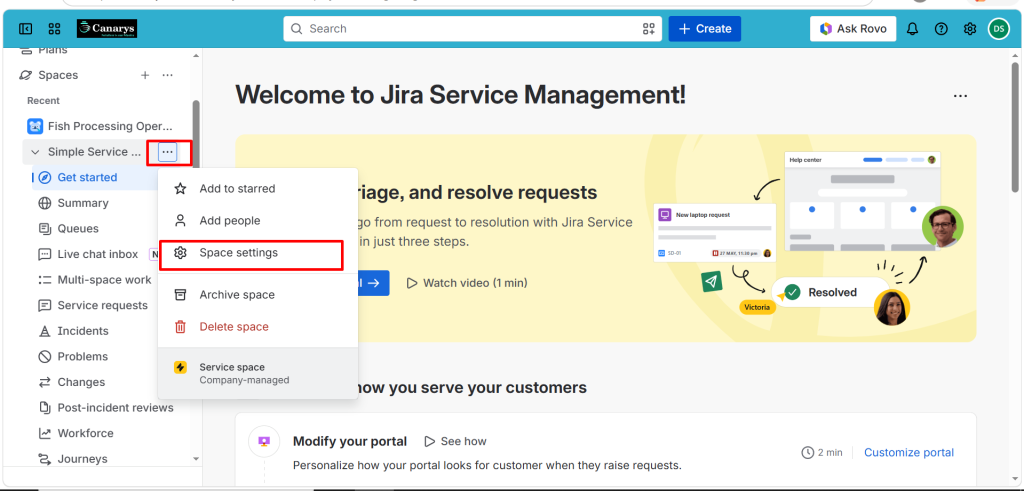
In your Jira Service Management project, click the three-dot menu (⋯) next to the space name and select Space settings from the dropdown menu.
Step 3: Select Virtual Service Agent
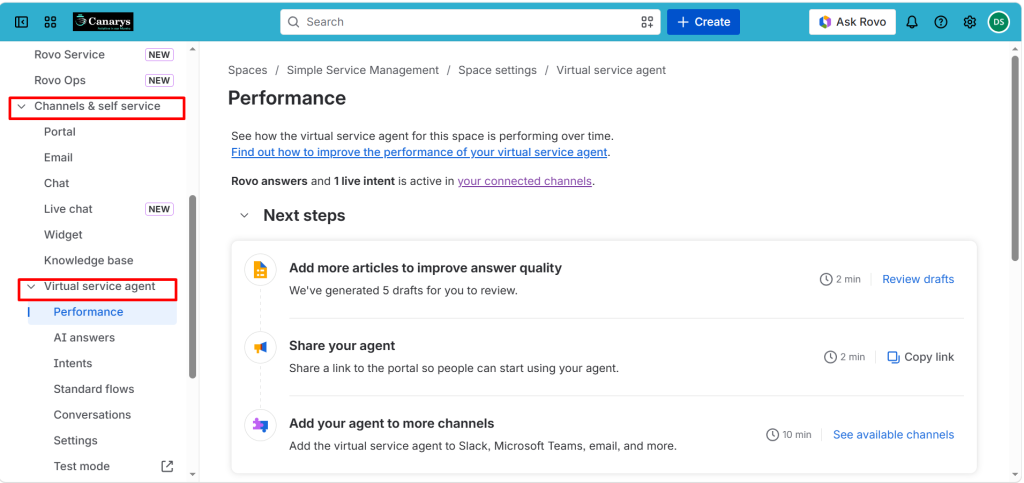
Under Channels / self service, click on Virtual Service Agent.
Step 4: Create and Train an Intent
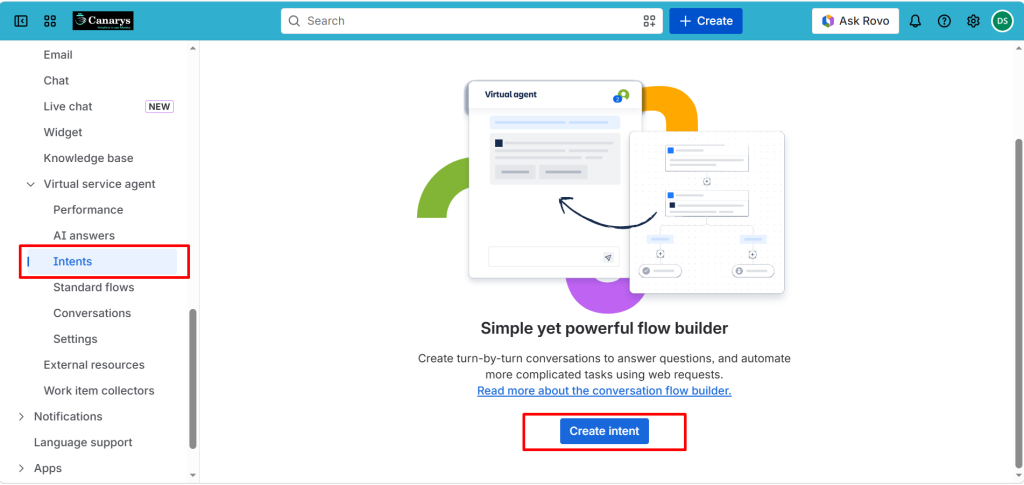
Navigate to the Intent tab and click Create Intent.
An Intent represents a specific request or issue that the Virtual Service Agent can understand and respond to. Intents help the agent identify what users are asking and provide the most relevant response.
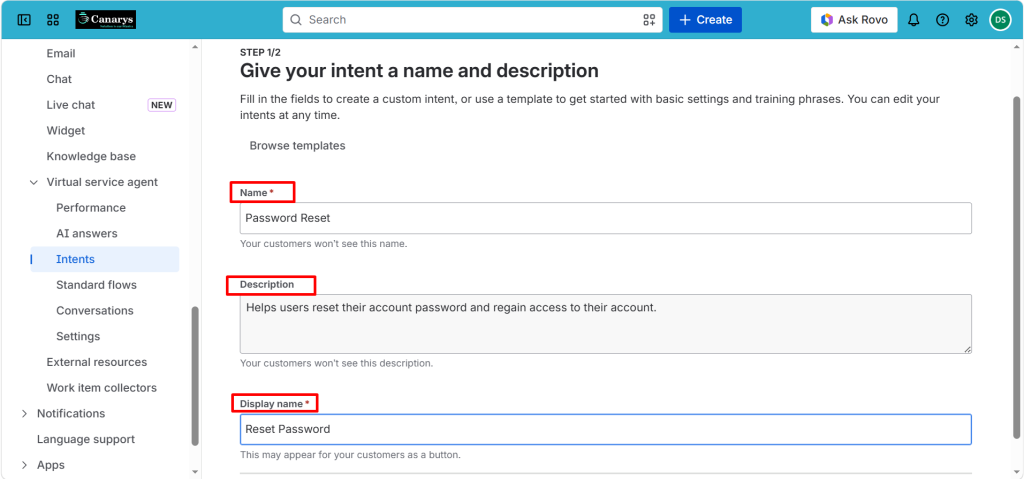
When creating an intent, provide:
- ~ Intent Name – A clear name that describes the request.
- ~ Description – A brief explanation of what the intent is used for.
- ~ Display Name – Name that may appear as a button in the Virtual Service Agent.
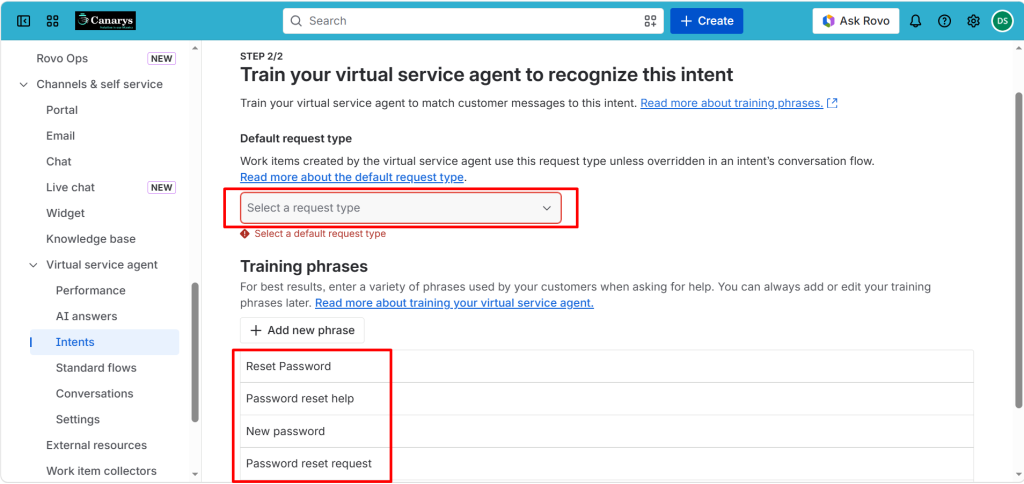
Default Request Type – Select the request type that should be used when the Virtual Service Agent creates a ticket for this intent.
Example: Get IT Help
Training Phrases – Add sample phrases that users might type when requesting help. These phrases train the Virtual Service Agent to recognize the intent.
Example: ~ I forgot my password
~ Reset my password
~ Password Reset
~ Password Reset Request
Step 5: Configure the Conversation Flow
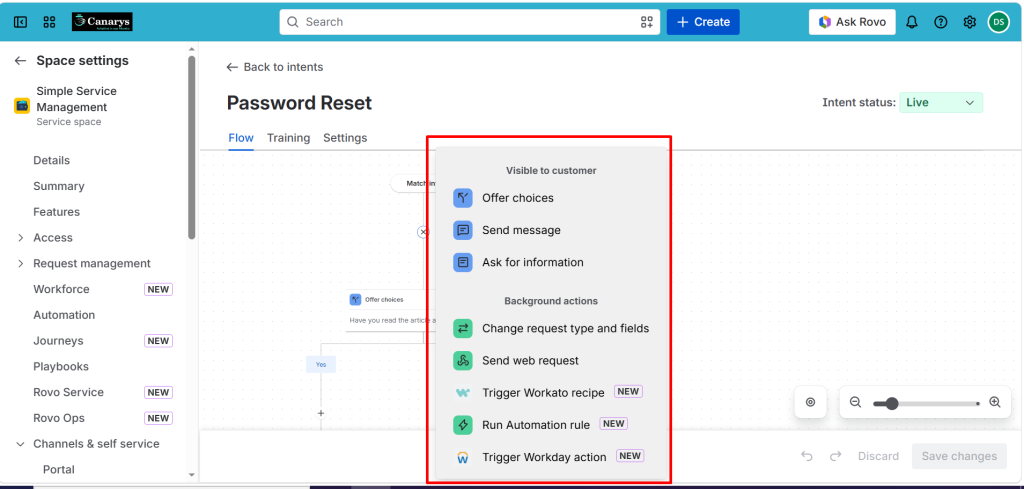
The next step is to build a conversation flow. A conversation flow defines how the Virtual Service Agent should respond when a customer asks a question that matches the intent.
You can add messages, questions, conditions, and actions to guide users toward a resolution.
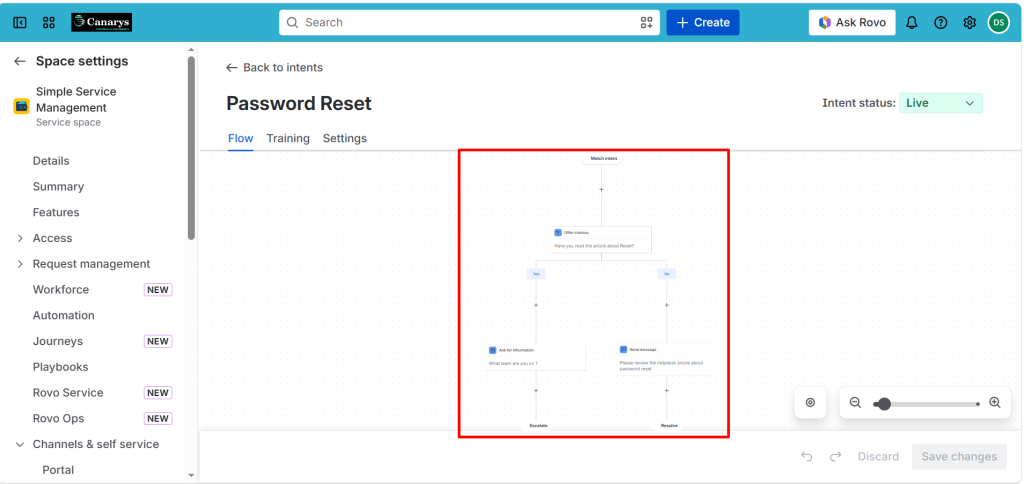
Example Flow: Password Reset Intent
When the Password Reset intent is matched, the Virtual Service Agent starts by offering a simple choice:
Have you read the password reset article? (Yes/No)
- ~ If No → Send message: “Please review the password reset article and try again.” and resolve the request.
- ~ If Yes → Ask for information: “What team are you on?” and proceed with escalation if needed
Step 6: Connect Knowledge Base (AI Answers)
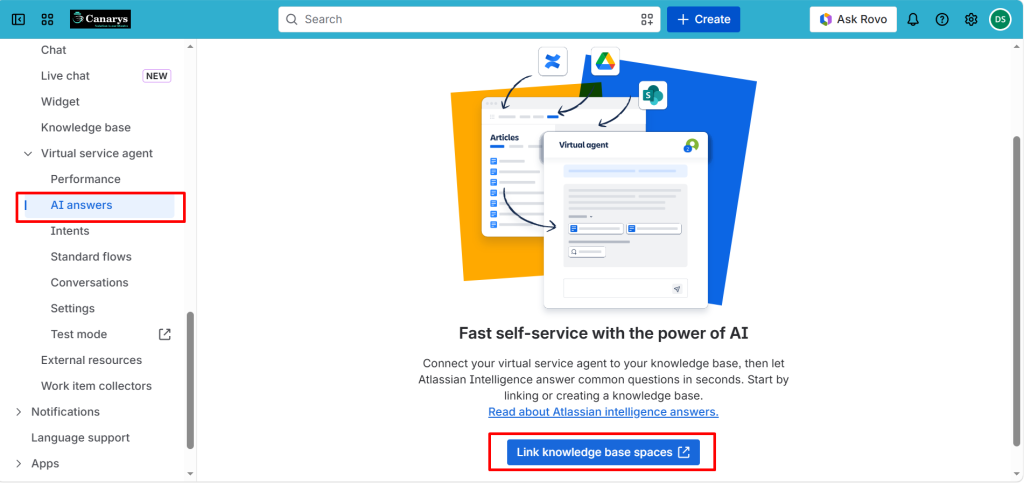
Click on AI Answers in the Virtual Service Agent settings and link a knowledge base by selecting the required knowledge base spaces.
Once linked, the agent uses knowledge articles to answer common questions instantly.
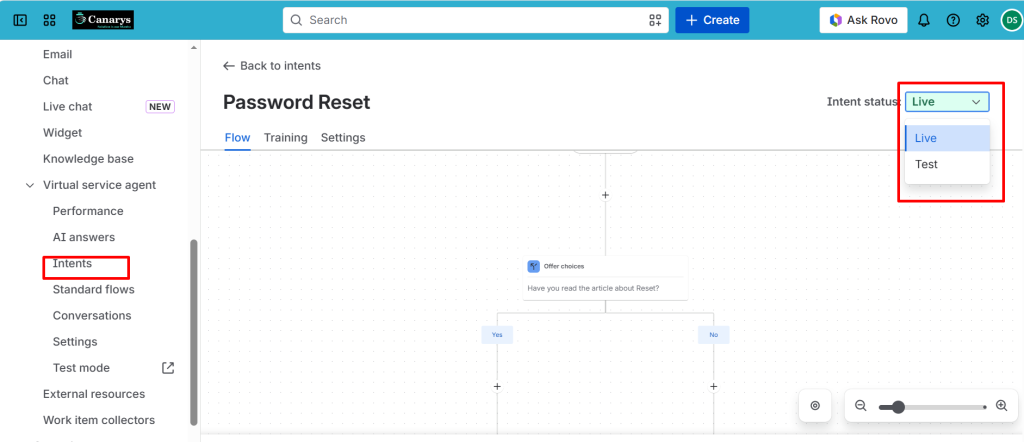
Step 7: Enable the Intent
After creating the conversation flow, go back to the Intents section.
Select the intent you want to activate and choose whether to set it to Live or Test mode.
- ~ Test mode → Used for verifying the flow before users can access it
- ~ Live mode → Makes the intent available to end users in the Virtual Service Agent
Step 8: Test the Virtual Service Agent
Before making the Virtual Service Agent available to all users, it is recommended to thoroughly test the configured intents and conversation flows.
To test the setup:
- ~ Go to the Test mode tab within the Virtual Service Agent settings.
- ~ Click on the Test mode tab, which will open a new browser tab in test mode.
- ~ In this test environment, you can try out all configured intents and conversation flows.
By following these steps, the Virtual Service Agent can be configured and associated within a Jira Service Management service project.
About Canarys Automations
As an Atlassian Gold Partner, we help organizations maximize the value of Atlassian tools through expert implementation, customization, and reliable support across the entire Atlassian ecosystem. Partner with us to enhance collaboration, streamline workflows, and drive business success. Contact us at atlassiansupport@ecanarys.com to get started.